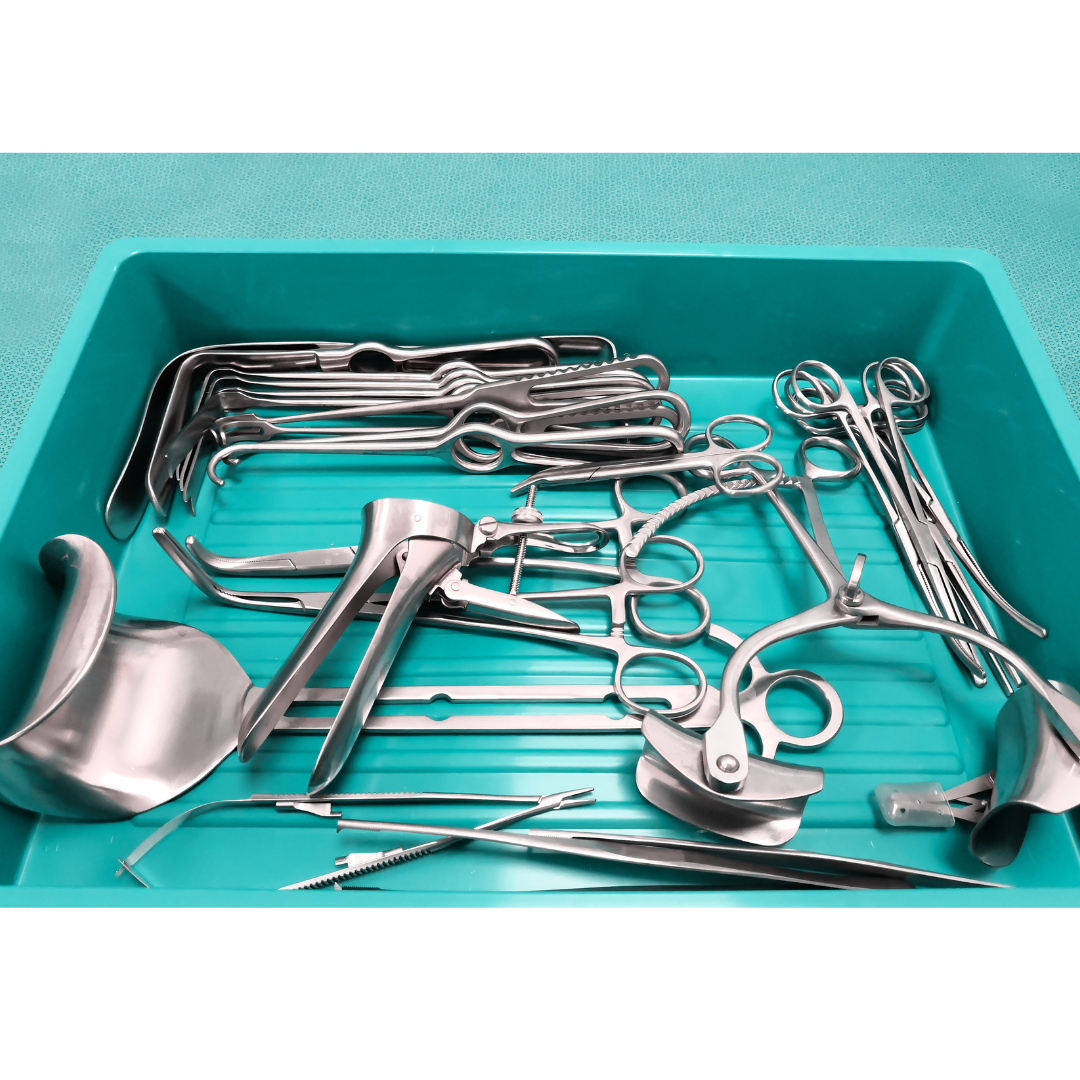
There exists a wide application of ultrasonic cleaning in the medical industry. It is extensively used for:
- Surgical tools cleaning.
- Endoscope tube cleaning.
- Orthopaedic implants cleaning.
- Surgical blades & hypodermic needles cleaning.
Effective sterilization requires effective cleaning, and when it comes to cleaning reusable instruments and equipment, our equipment & detergents meets the most demanding criteria. Our industrial ultrasonic cleaners are used to assist with the cleaning of instruments that cannot be adequately cleaned manually such as spiral wound instruments like biopsy forceps etc. The ultrasonic vibration at the frequency used for cleaning does not kill microorganisms and infective aerosols may be produced. Ultrasonic cleaners work by subjecting instruments to high frequency, high-energy sound waves. This causes the soil to be dislodged from instruments and drop to the bottom of the tank, or be sufficiently loosened that it will be removed during the rinsing process. The detergent used in the ultrasonic tank must be carefully selected in accordance with advice from the tank's manufacturer. Optimally it will be a neutral, low-foaming product and enzymatic cleaners will have enhanced benefits in this process. The presence of organic material such as blood faces and respiratory secretions can result in the failure of disinfection. This may be because either the organic material protects the microorganisms from exposure to the biocide or because the biocide may be inactivated by contact with organic material. Consequently, rigorous cleaning of flexible endoscopes is required to remove such material before disinfection or sterilization. This should occur immediately after use to prevent the drying of secretions.
Ultrasonic cleaners play a crucial role in the washing of surgical instruments, offering several benefits that enhance the cleaning process. Here are some ways in which ultrasonic cleaners help:
-
- Improved Cleaning Efficiency: Ultrasonic cleaners use high-frequency sound waves to create millions of microscopic bubbles that implode, generating a scrubbing action that dislodges and removes debris, including blood, tissue, and other contaminants, from the instruments.
- Enhanced Removal of Biofilm: Ultrasonic cleaners are effective in removing biofilm, a complex matrix of microorganisms, from instrument surfaces. Biofilm can harbor bacteria, viruses, and other pathogens, making it a significant concern in surgical instrument washing.
- Reduced Risk of Cross-Contamination: Ultrasonic cleaners help reduce the risk of cross-contamination by removing debris and microorganisms from instruments, making them safer for reuse.
- Gentle on Instruments: Ultrasonic cleaners are gentle on instruments, reducing the risk of damage or wear, and extending their lifespan.
- Increased Productivity: Ultrasonic cleaners can process multiple instruments simultaneously, increasing productivity and reducing the time spent on manual cleaning.
- Improved Consistency: Ultrasonic cleaners provide consistent cleaning results, reducing the variability associated with manual cleaning methods.
- Reduced Chemical Usage: Ultrasonic cleaners can reduce the amount of cleaning chemicals required, making them a more environmentally friendly option.
- Effective Cleaning of Complex Instruments: Ultrasonic cleaners are particularly effective in cleaning complex instruments, such as those with hinges, crevices, or other hard-to-reach areas.
- Reduced Risk of Instrument Damage: Ultrasonic cleaners reduce the risk of instrument damage caused by manual cleaning methods, such as scratching or bending.
- Compliance with Regulatory Guidelines: Ultrasonic cleaners can help facilities comply with regulatory guidelines, such as those set by the Centers for Disease Control and Prevention (CDC) and the Association for the Advancement of Medical Instrumentation (AAMI).
Studies Supporting the Efficacy of Ultrasonic Cleaners
Numerous studies have demonstrated the effectiveness of ultrasonic cleaners in surgical instrument washing, including:
- A study published in the Journal of Hospital Infection found that ultrasonic cleaning reduced the bacterial load on surgical instruments by 99.9%.
- A study published in the American Journal of Infection Control found that ultrasonic cleaning was more effective than manual cleaning in removing biofilm from surgical instruments.
- A study published in the Journal of Surgical Research found that ultrasonic cleaning reduced the risk of cross-contamination and improved the overall cleanliness of surgical instruments.
In conclusion, ultrasonic cleaners play a vital role in surgical instrument washing, offering improved cleaning efficiency, reduced risk of cross-contamination, and increased productivity, among other benefits.
Step-by-Step Guide to Using an Ultrasonic Cleaner for Surgical Instruments Washing
Pre-Cleaning Preparation
-
- Sort and prioritize instruments: Separate instruments into categories based on their level of soiling and priority for cleaning.
- Remove gross debris: Use a soft-bristled brush or a lint-free wipe to remove any visible debris or blood from the instruments.
- Select the appropriate cleaning solution: Choose a cleaning solution specifically designed for ultrasonic cleaning of surgical instruments.
Ultrasonic Cleaning Cycle
-
- Fill the ultrasonic cleaner: Fill the ultrasonic cleaner with the selected cleaning solution to the recommended level.
- Set the temperature: Set the temperature of the cleaning solution according to the manufacturer's instructions (typically between 100°F and 140°F).
- Select the cleaning cycle: Choose the appropriate cleaning cycle based on the type and level of soiling of the instruments.
- Place instruments in the ultrasonic cleaner: Carefully place the instruments in the ultrasonic cleaner, ensuring they are fully submerged in the cleaning solution.
- Start the ultrasonic cleaning cycle: Activate the ultrasonic cleaner and allow it to run for the recommended time (typically 10-30 minutes).
- Rinse instruments: After the cleaning cycle, remove the instruments from the ultrasonic cleaner and rinse them thoroughly with deionized water to remove any remaining cleaning solution.
Post-Cleaning Processing
-
- Dry instruments: Use a lint-free wipe or air dry the instruments to prevent water spots.
- Inspect and reprocess: Inspect the instruments for any remaining debris or residue. If necessary, reprocess the instruments through the ultrasonic cleaning cycle.
- Sterilize instruments: Sterilize the cleaned instruments according to your facility's sterilization protocols.
Tips and Considerations
-
- Use a cleaning solution specifically designed for ultrasonic cleaning: These solutions are formulated to work effectively with ultrasonic energy and are gentle on instruments.
- Avoid overloading the ultrasonic cleaner: This can reduce the effectiveness of the cleaning cycle and potentially damage instruments.
- Regularly maintain and clean the ultrasonic cleaner: This will ensure optimal performance and prevent the buildup of debris and contaminants.
- Follow the manufacturer's instructions: For both the ultrasonic cleaner and the cleaning solution, as well as any specific guidelines for cleaning and sterilizing surgical instruments.
By following these steps and guidelines, you can ensure effective and efficient cleaning of surgical instruments using an ultrasonic cleaner.
Purchasing Considerations
When purchasing an ultrasonic cleaner, consider the following factors:
-
- Dimensions: Ensure the processing chamber is sufficient to accommodate the widths and lengths of all soiled instruments.
- Power: Check if the cleaner has adjustable power settings to permit processing of lightly- and heavily-soiled instruments, as well as delicate instruments.
- Standard Cleaning Time: Check if the cleaning time can be adjusted for big loads and heavily-soiled instruments.
- Instrument Compatibility: Ensure the ultrasonic cleaner is labelled for use with a variety of instruments and that the manufacturer has data to support its cleaning effectiveness.